Excerpt From An Article
This article is an excerpt from another article: Complete Guide to Custom Fields for Onboarding
Navigating to Onboarding Custom Fields
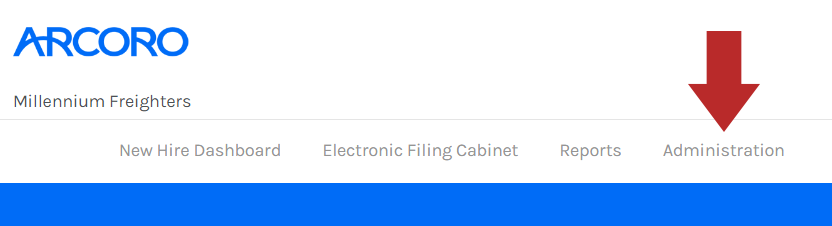
- Click Administration from the top menu bar of Onboarding.
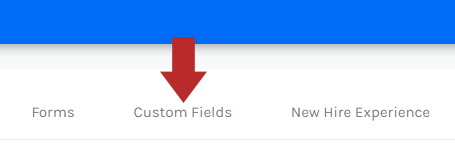
- In the Administration menu, click the Custom Fields tab.
- From the Custom Fields page, you will see any existing custom fields for your employees and your managers.
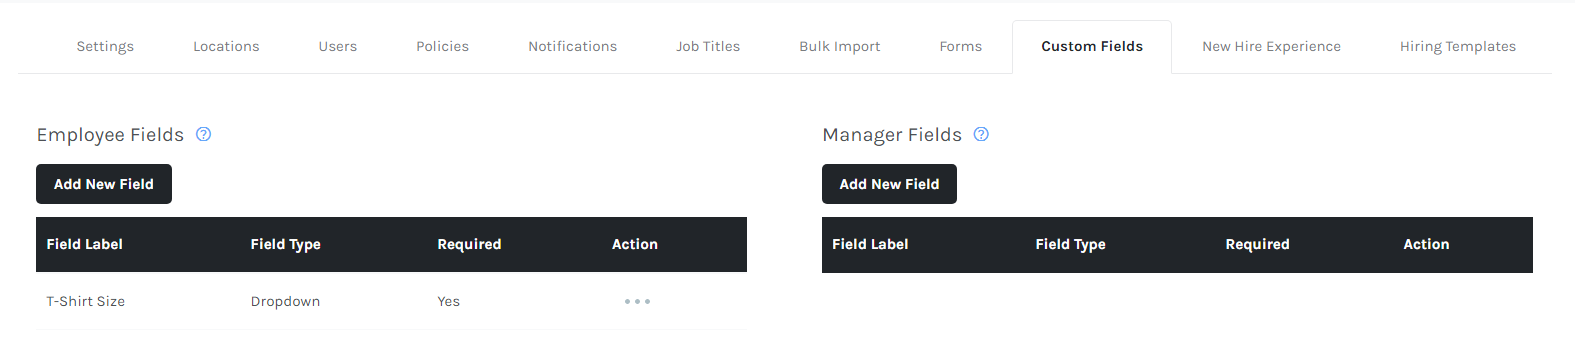
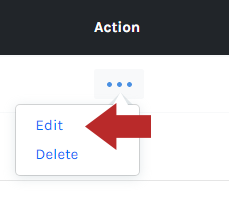
- Click the ... button under the Action column from the Employee Fields or Manager Fields section.
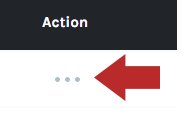
- Click Edit.
- Modify the custom field as needed.
- Field Label Text - The name that is displayed to the new hire.
- ID - This field will be automatically populated based on the field labeled texts you've entered with underscores instead of spaces. Can be updated as needed.
- Field Type - Select the field type from the drop-down menu.
- Text - Allows text to be entered.
- Date - Allows a date to be selected.
- Dropdown - Allows you to create a list of choices to be selected from. When entering the choices, add the options one per line.
- Required Input - Make the field required.
- If making the field required, keep in mind that the new hire/manager may not be able to enter the information when filling out paperwork if they were not made aware of it prior.
- Description - Enter the help text that a user can reference to better understand what the field is asking for. The text entered here will be displayed if the user hovers over the question mark icon next to the field
- Sort Order - The sort order determines the order in which the fields are displayed (e.g. 1, 2, 3, etc.).
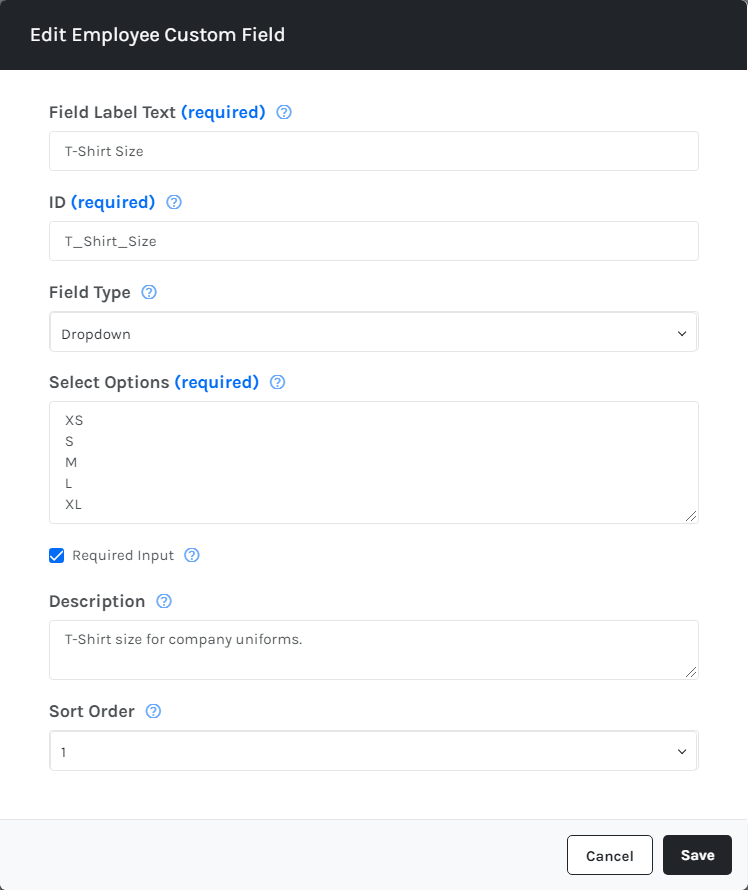
- Click Save when finished.