Pay Periods can be established in ExakTime Connect to make it easier to view the time from a specific payroll date range, allow you to quickly jump between different pay periods, and help calculate your overtime properly.
Only One Pay Period Allowed
If your company has multiple pay periods for different employees, such as bi-weekly for office workers and weekly for field workers, it can be best to set up your pay period with the smaller possible pay period.
Setting up your Pay Period
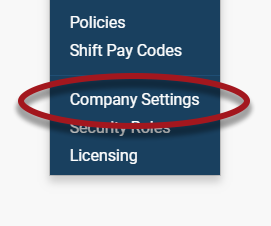
- Go to Manage in the top menu bar, then click on Company Settings.
- Within Company Settings, go to the Time & Attendance section.

- There will be an option indicating that there are No Predefined Pay Periods
To define pay periods, click Edit to the right.

- Establish your pay periods from the following options:

- Weekly
- Every 2 Weeks
- Twice a Month
- Every 4 Weeks
- Once a Month.
- After specifying your pay period schedule, you will specify the date of when the next pay period will start.
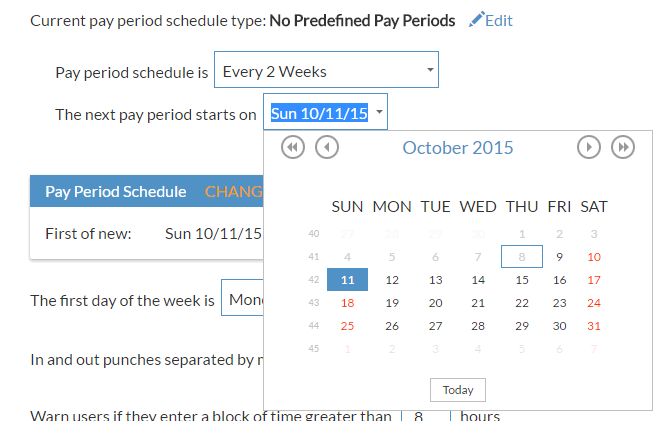
- Below the pay period selection, you will specify the first day of your work week. This is very important as it helps determine how your weekly overtime will calculate if any.

- Click Save at the bottom.
Using Your Pay Period
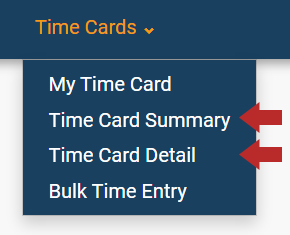
- To view a pay period, go to Time Cards in the top menu bar and click on either Time Card Summary or Time Card Detail.
- In the top right, you should see your pay period/date range selector.

- Clicking on the drop-down menu allows you to go to jump between adjacent pay periods, pay weeks, or specific days.
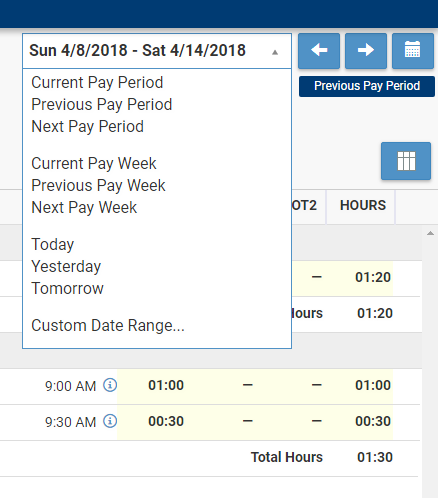
- Clicking the calendar icon allows you to view specific dates, up to 31 days.

"no pre-defined pay periods"